How to set up Paytrail payment page
The first thing you need to do is to contact Paytrail, make a contract for them to become your payment provider and apply for a Payment Page.
When you have a contract in place with Paytrail, you can connect Paytrail and Bókun.
How do I add Paytrail as a payment provider?
Click Settings then Sales settings in the navigation and then click Payment providers.
Select the blue Yes button in order to configure Paytrail as your payment provider.
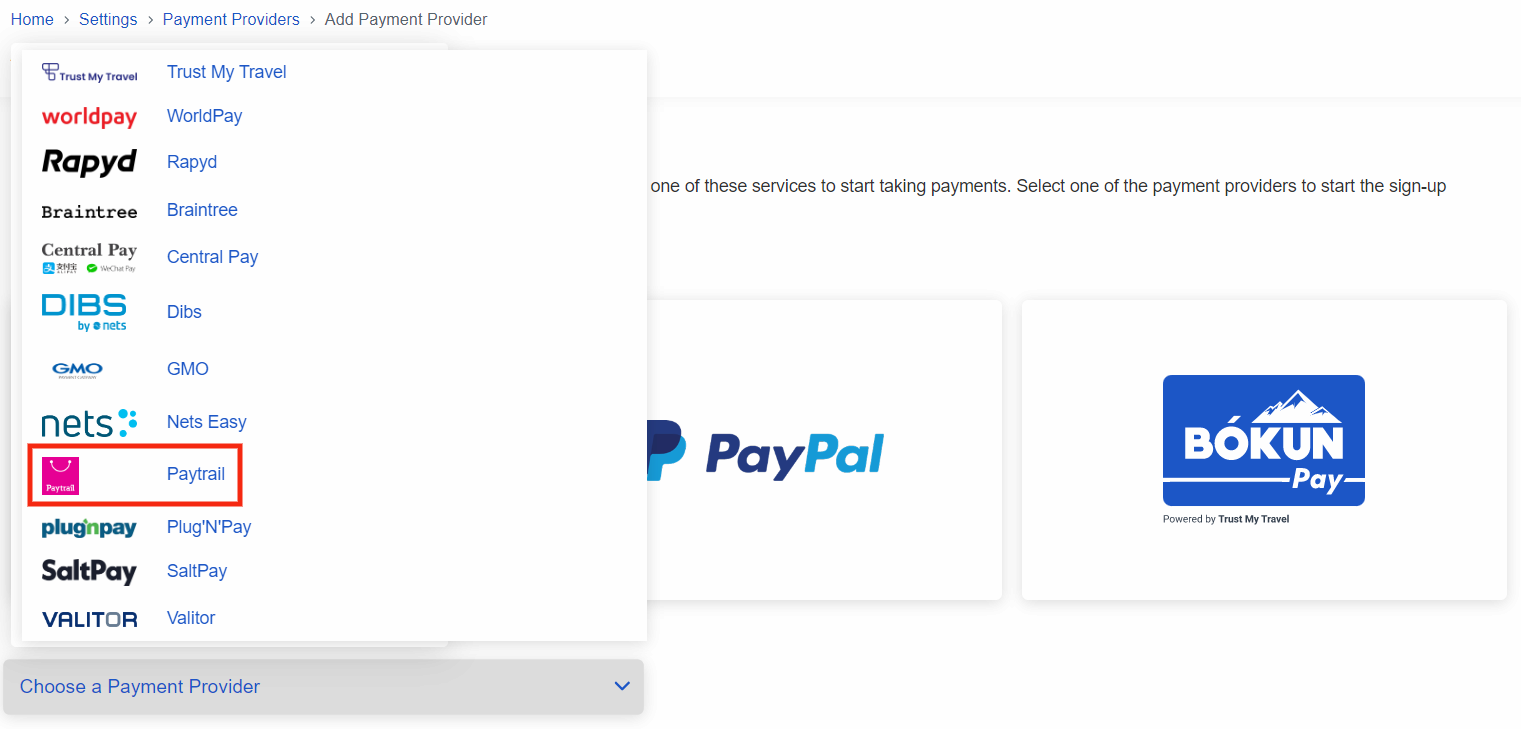
Click the Paytrail logo to add them as your payment provider.
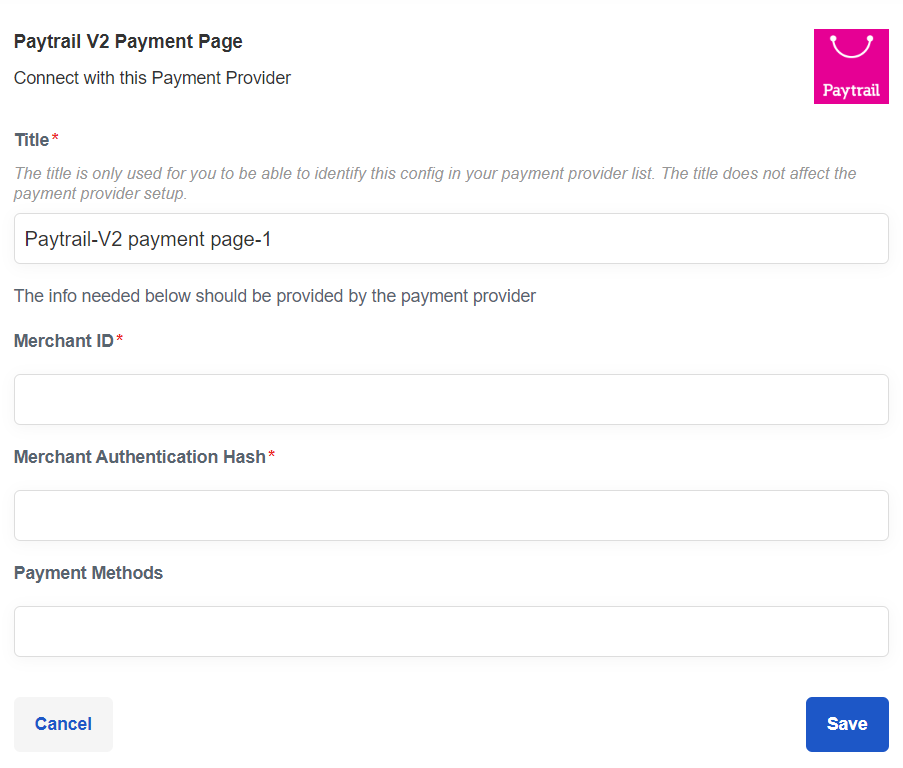
Fill in the following form according to the integration information you get from Paytrail. You choose the name yourself but Paytrail provides you with all the other information.
Merchant ID: Paytrail provides this code
Merchant Secret Key: Paytrail provides this code
Payment Methods: leave this field EMPTY to allow all card types.
Specifications could be:- mobile - Mobile payment methods: Pivo, Siirto, MobilePay
- bank - Bank payment methods
- creditcard - Visa, MasterCard, American Express
- credit - Instalment and invoice payment methods: OP Lasku, Walley/Collector, Jousto, AfterPay
✴️ Please make sure you copy the whole code and that there are no spaces in the fields. You will otherwise get an error message when you try to continue to payment in the booking process.
Make sure to Save your payment progress once all information has been entered.
What next? How do I start accepting payments via Paytrail payment page?
You need to add the payment provider to your Booking Channel. A booking channel is an online sales channel that tracks where your online bookings are coming from. Usually, it will be your company's website. Learn more about Booking Channels.
You can sign up for more than one payment provider, that's why you need to select the correct one. You can for example use one payment provider for your European travelers, and another one for your US travelers.
Once your payment provider has been added, you will be automatically asked to assign it to a booking channel.
You can make further changes to your booking channels if you go to the booking channel article.
Now you are set and ready to accept payments on your website.
✴️ If you want to assign a previously created payment provider, you can also just select the channel symbol.

The last step: Test your payment process
After you add a booking engine to your website, it's a good rule to create a booking and pay for it. This is to test both the booking process and to double check that your payment option is functioning as it should. Learn more about how you can add a booking engine to your website and test the whole booking process.
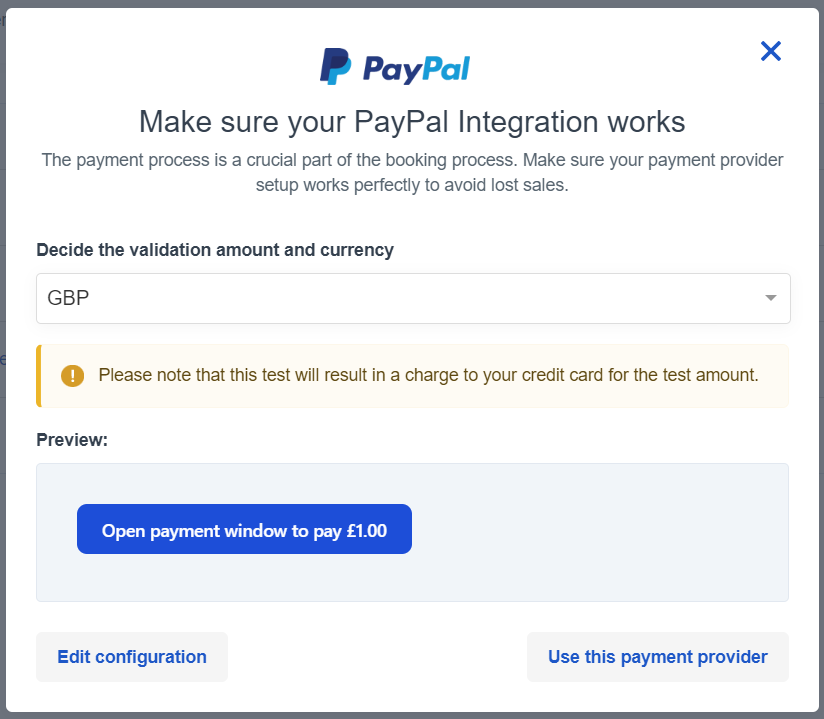
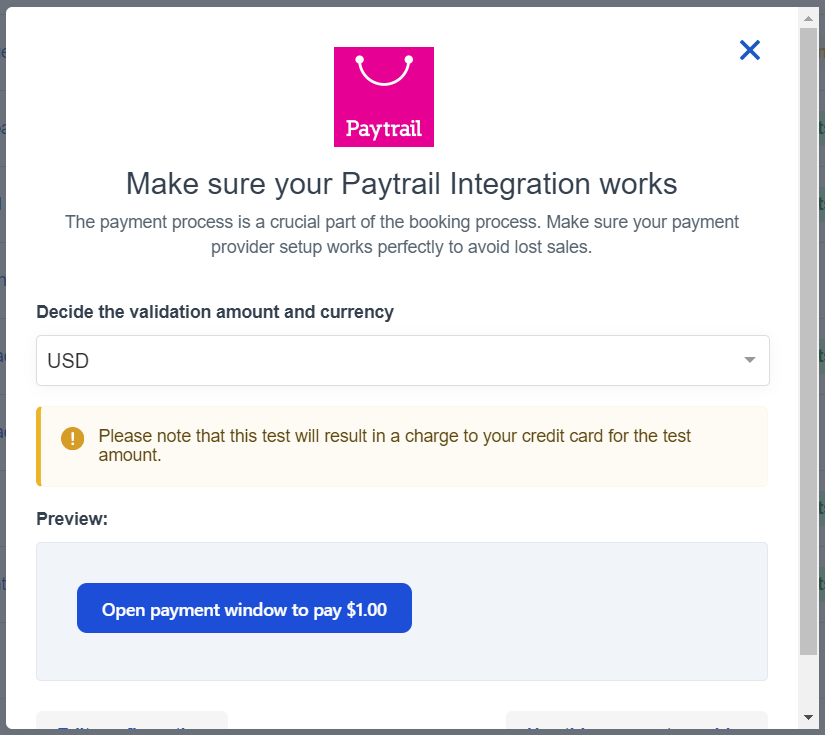
If your payment provider is either a redirect page or a Rapyd or Stripe token, you can test your payment provider directly in the payment provider section instead.

- Select the test icon on the right-hand side of the payment provider.
- You’ll then be able to test the connection charging 1 USD or the equivalent in your preferred currency to your credit card/payment provider.
⚠️ Please note that this test will result in a charge to your credit card for the test amount.