Claim your free domain for your Bókun website
A domain name is the web address you type into your browser's search bar. You can think of it as your unique website URL. In simple terms, if your website was a house, then the domain name will be its address.
As a Bókun PRO user, you have two choices for picking the URL (aka Domain name) for your Bókun-powered website:
- Search for your ideal web address and choose a NEW domain name for free. This tool is powered by GoDaddy and PRO subscribers can claim 1 (one) free domain name.
- Use your existing website domain. If you already own your domain name this is likely the best option for you.
How can you claim the custom domain?
Bókun has partnered with GoDaddy to include one (1) free custom domain with your active Bókun PRO subscription. This domain name will be purchased and owned by Bókun.
Note this option is not available during the free 14-day trial period.
Here are the step-by-step instructions to claim your custom Go-Daddy domain through Bókun:
- Click on Sales Tools > Websites on the left-hand side navigation menu
- Publish your website to unblock the domain settings section
- Click on Domain settings on the left side menu
- Click on the Get Started button to claim your domain
- Enter the domain name you’d like to use and click on Search to see if it is available. The system will show a list of domain names available
- Select your domain name and click on Register
- Click Confirm to confirm the purchase
Before confirmation, a pop-up window will remind you that you can only claim one (1) domain and that it can take a few hours to establish a connection and generate an SSL certificate for your domain. This is normal. If you are still unable to connect your domain name after 48 hours, please contact support for assistance.
Changing your DNS settings
If you need to change your DNS settings for your Bókun custom GoDaddy domain, you can. Before editing the DNS records, please make sure that you know what steps to take, as you may break your website otherwise.
Go to Domain settings and click the Edit DNS records button.
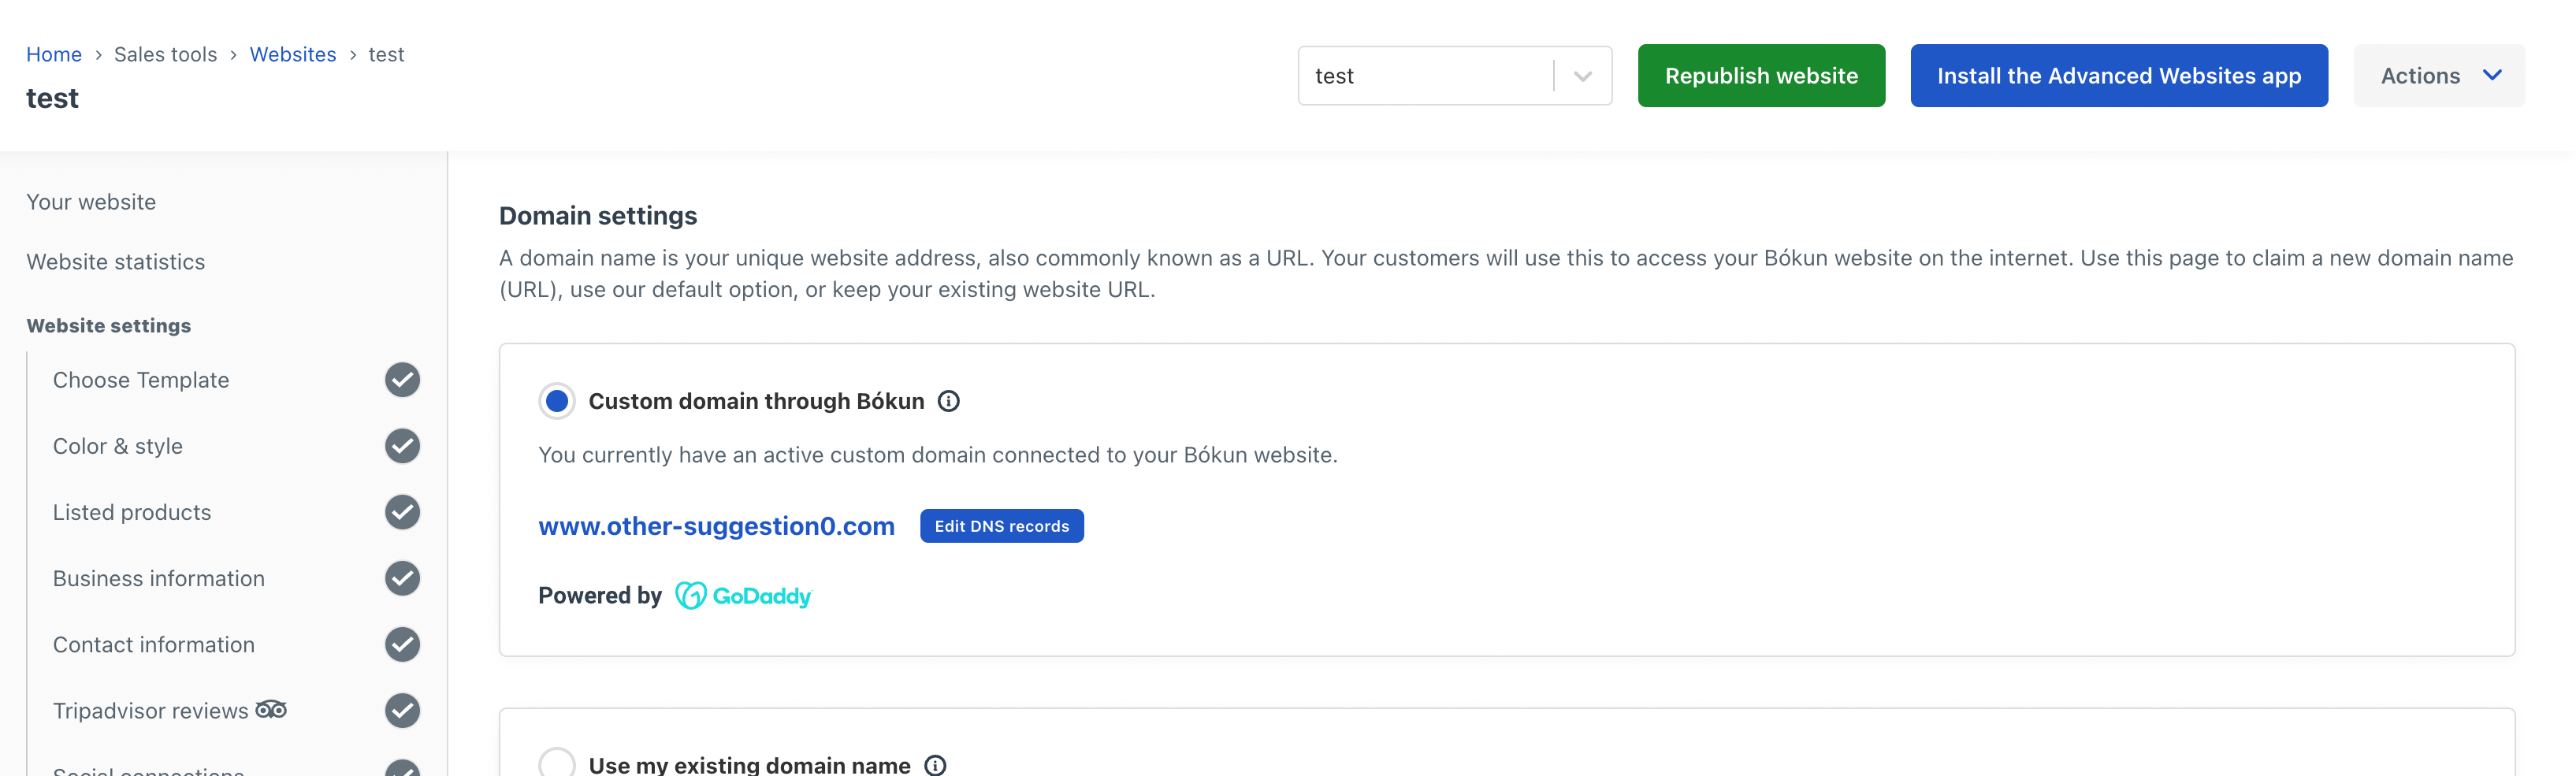
You’ll see a pop-up showing the current DNS records for your website. You’re able to access and edit them through this window.

Adding an MX record If you’re looking at changing the email domain you reply from to your website, you might be asked to add the MX records to connect to the email provider. We’ll show you a step-step guide based on Googles Workspace.
You may have a different email provider, the main steps of this article will still apply, but you might need to check your email provider's help centre for their detailed step-by-step guide.
Steps in Bókun
- Select the Edit DNS records button.
- Click Add new record, and you’ll see the following:
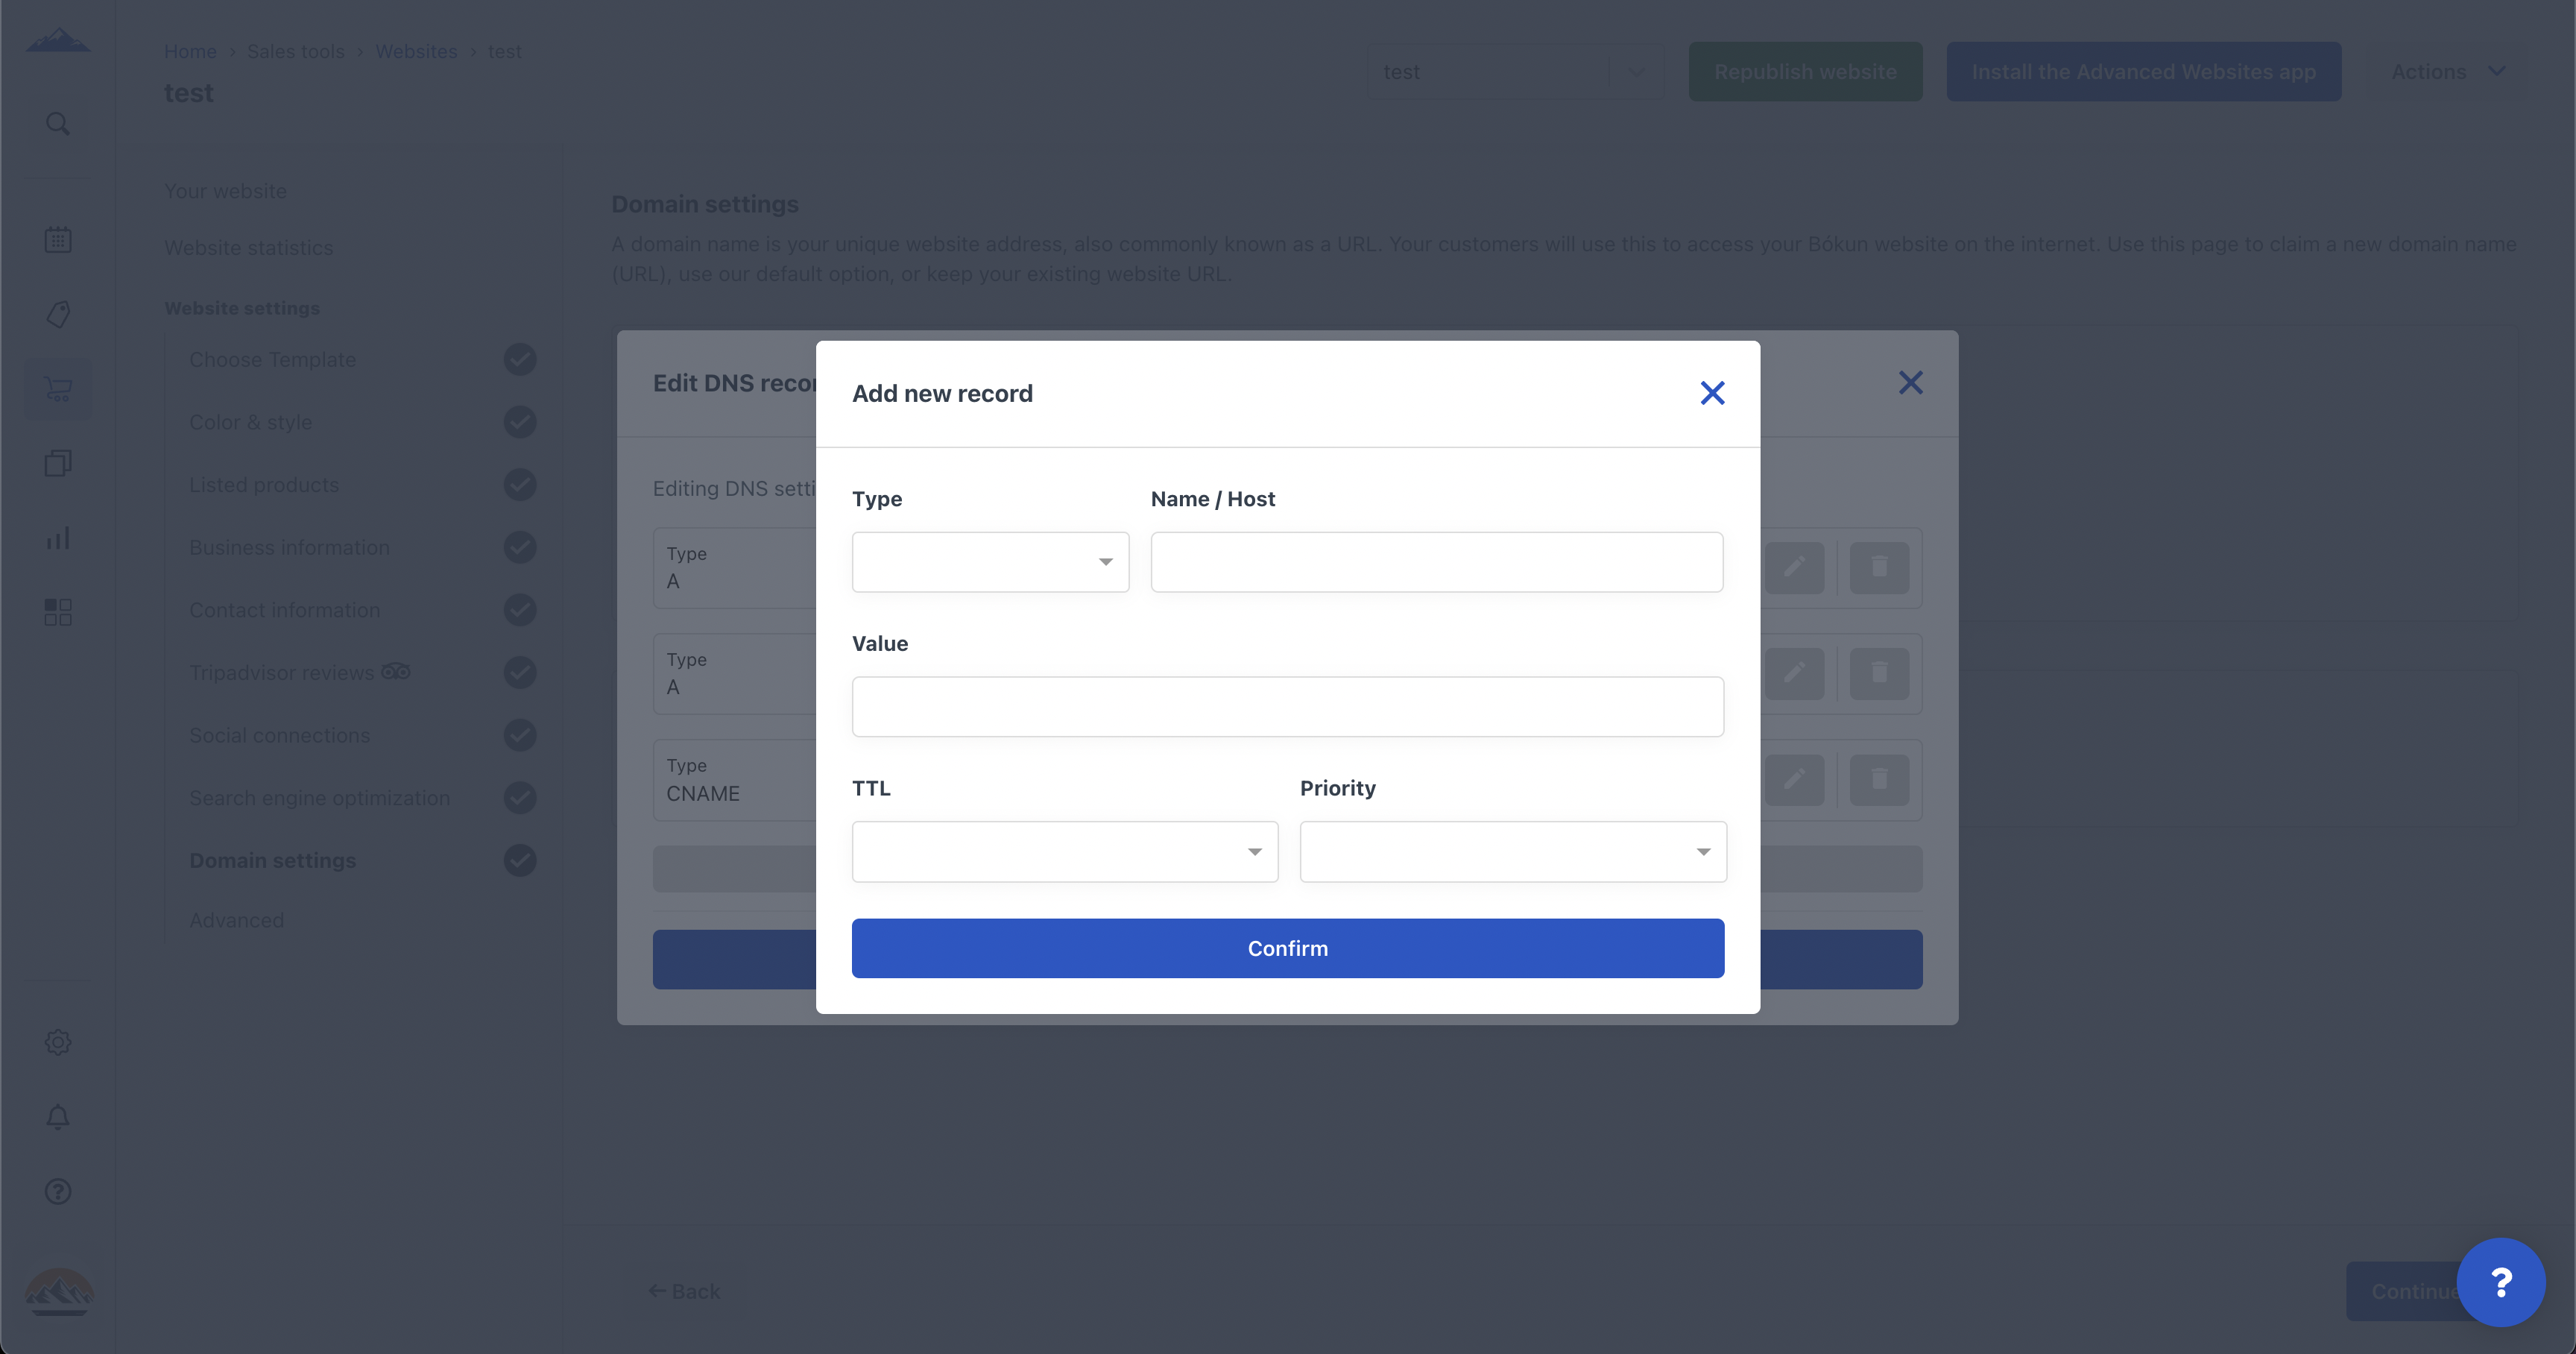
- Type: Select MX
- Name: Enter @. (If @ causes an error leave this field blank).
- Value: Copy and paste the MX record from the setup tool in Google.
- TTL: Enter 1 hour, or you can leave the default value.
- Priority: Enter 1
- Note: if Bókun rejects a Google MX record, try adding a period after the .COM.
You’d now have to return to your email provider and finalise the setup. For Google, you can find the information on Google’s help centre.
Important considerations
Please note that you have access to only one (1) GoDaddy domain per account, and you can not change the domain once you have claimed it. This means that if you wish to change your domain, you will need to purchase a new domain outside Bókun and then connect this new domain to your Bókun website.
Bókun owns your GoDaddy domain; therefore if you decide to cancel your Bókun PRO subscription, you won’t be able to use the same URL for any website created outside of Bókun. However, if you choose to come back and reactivate your PRO subscription, you’ll be able to use it again.