Bókun website: How to add a gallery
Add multiple images to your website and display them for your customers in a gallery, a page, or even a pop up.
When images in the Photo Gallery are clicked, they can be opened in a light box gallery or linked to a page on your site, a website URL, a pop-up, an anchor, an email address or more. You can add titles, descriptions and alternative text to each image.
By adding the Advanced Website Upgrade app, you can add a gallery to your website. The App is FREE of charge. Get more information on our Apps.
How to an image gallery to your website
- Click Widgets in the left-hand side menu
- Click Photo gallery
- Drag the widget to the desired location on your website.
4. Once the widget has been placed, the Content Editor appears.
How to add images to your gallery
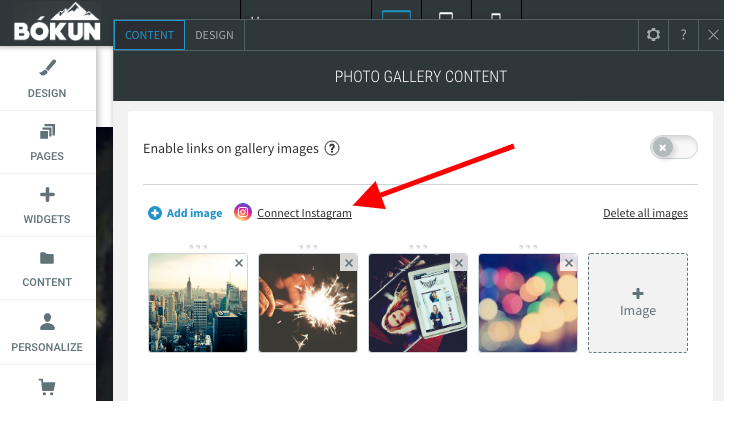
(Optional) To enable links on gallery images, click the Enable links on gallery images toggle at the top of the editor. This will make each individual image a clickable link instead of opening the gallery.
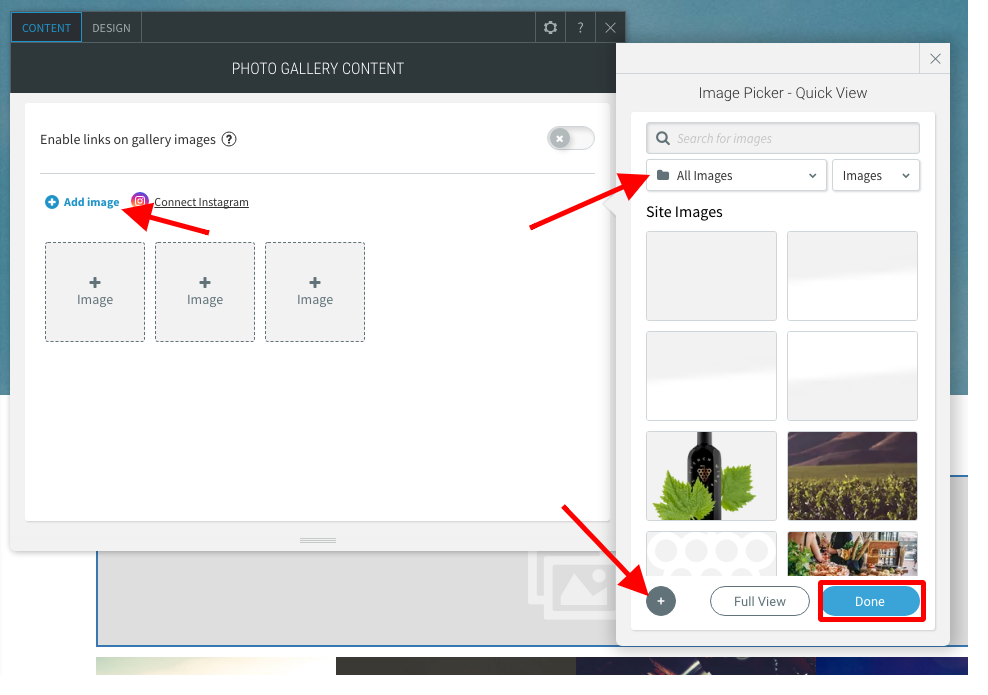
1. Click Add image. You have the following options to add images:
- Select any of the images you have in the image picker.
- Select the folder with images you want to use.
- Click the grey + icon to upload your own images.
- Switch to the Full View for more image options.
2. Click Done When you have selected the images you want.
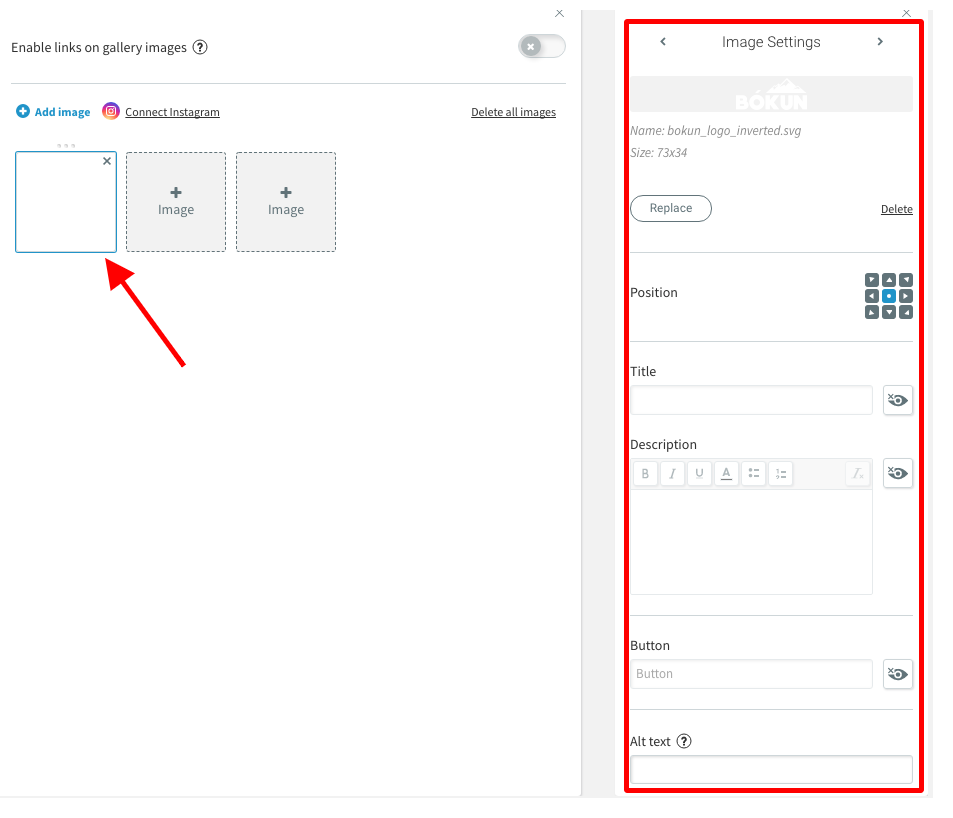
3. To edit the position, add a title, description, and button to your image, click the image and edit the Image settings. Use the rich text editor to add colour, emphasis (bold, italics and underline), and bullets to text in the description box.
How to customize the Photo Gallery
1. Click any of the images in the Photo Gallery widget
2. Click Design in the top menu.

Layout
To change the gallery layout, click the Layout tab. You have the following options:
- Click the existing layout to see more design options for your photo gallery. Layouts are managed per-device and based on the current view in which the layout is selected.
- Text can be added under images, on the hover, or on the image. Select Text/button under image, Text/button on hover, or Text/button on image, and then select a position for the text/button.
- Select the number of columns in the Photo Gallery.
- To adjust the number of columns automatically to avoid white space, click the auto adjust columns toggle.
- Select how many visible rows you want to display.
Item
To change the image height and spacing between the images, click the Item tab. You can also add rounded corners, display the full image on the gallery, add shadows, and change the image hover effect and animation (available in new widget). This is only applicable for certain layouts.
Frame
To configure the frame style, add a background colour, and customize the border, click the Frame tab. To hide the share option, click the Hide share images toggle. This removes the share button users see when clicking an image.
Spacing
To change the inner and outer spacing, click the Spacing tab.
How to add an Instagram Feed
Users with an Instagram Business or Creator account can add an Instagram feed to the photo gallery widget.