How to create and use Booking Channels
This article explains what a booking channel is and how to create and use one.
What is a booking channel?
A booking channel is an online sales channel that tracks where your online bookings are coming from. Usually, it will be your company's website, but it can also be an OTA, offline bookings or booking channels for specific partners.
When you sign up for Bókun, you are asked for your company website. Your website will be one of your booking channels in Bókun. The other booking channel that is automatically created for you is your internal bookings channel. This channel is for all bookings made directly on Bókun by you or a member of your team.
Where do I find my booking channels?
Type booking channels in the search bar or click on Settings > Booking channels in the side navigation menu . Here you have a list of your available booking channels.
When do I need to create new booking channels?
When working with referral tracking, you might create a booking engine for your partners to add to their website. In this case, you would need to add your partner's website to your booking channels in Bókun.
Here is an example: a hotel wants to sell your products on its website by allowing travellers to book on the hotel website directly. To separate the bookings that come in from your website from the bookings that come through the hotel's website you can add them as an affiliate and create a booking channel.
Also, when you connect to OTAs like Viator, a new booking channel is automatically created for each of them.
How do I create a booking channel?
To create a booking channel:
1. Settings > Booking channels
2. Click the blue New Channel button on the top right corner of the page
3. Type in the name of the booking channel. It is a good idea to use a descriptive name, like the name of the website, so you can differentiate between your booking channels.
4. Follow the product wizard on the left-hand side to create online booking engines, adjust the settings, etc. for your new booking channel. Remember to click the blue Save and continue in each step.
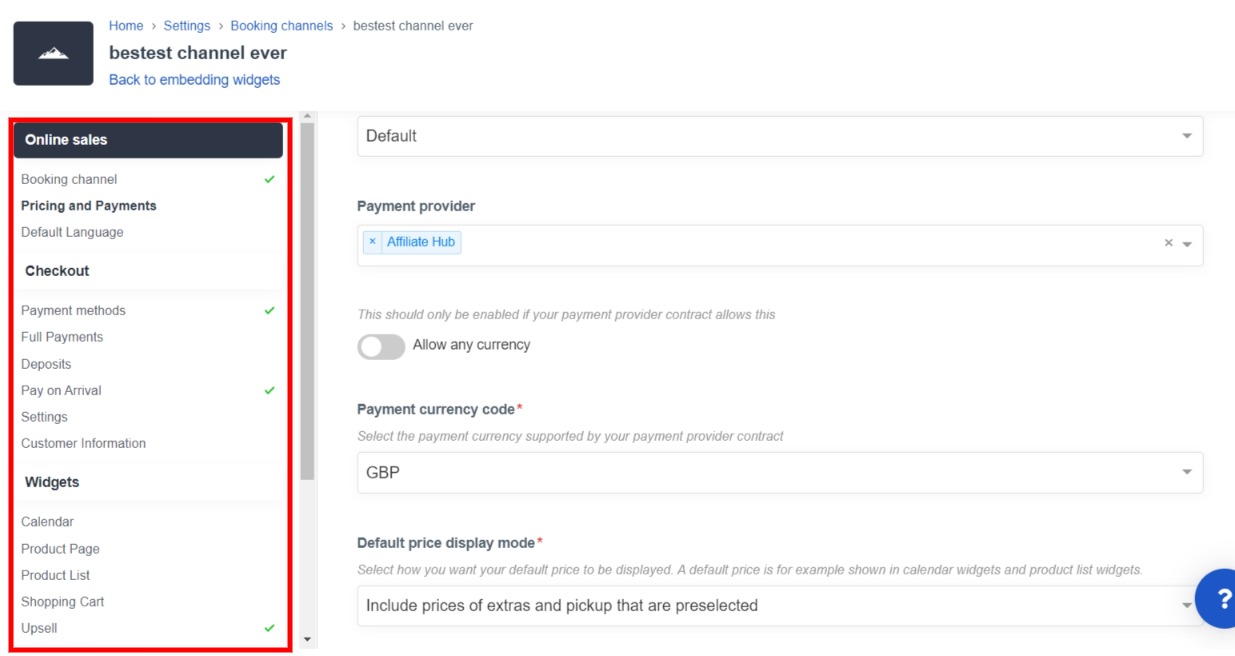
Online sales
- Add a payment provider to your booking channel to accept online payments. Learn more about payment providers.
- Change the language of your booking channel and your booking engine widgets. Learn more about changing language.
- Set your default price shown on your widget - Do you want your extras to be included or excluded.
Checkout
- Choose which payment methods to offer your customers. You can offer full payment, deposits and paying on arrival. You can also define a discount for each payment method. Learn more about payment methods.
- Select types of customer information you want to collect during checkout and if you will offer guests to subscribe to news & offers when checking out.
- Allow the use of promo codes and gift cards in your widgets.
- You can select the option to show a confirmation box on check out for your guests to confirm they've read the terms and conditions and agree to the privacy policy.
Widgets
- Customize your online booking engine widgets for your booking channel. You can customize your calendar, product page and product list.
- Upsell additional products after a customer has finished their booking by showing them a product list of additional products. Learn more about upselling your products.
Advanced
- Add tracking to your booking channel to get further data on your customers. Learn more about Google Analytics.
- Upsell additional products after a customer has finished their booking by showing them a product list of additional products.