How to use Booking Labels
Use booking labels to filter your sales data
You can add booking labels to your bookings in order to help you filter reports like the Sales Feed and the Income Statement by booking labels. You can add multiple labels to your bookings.
Booking labels are very useful for categorizing your bookings, e.g. if you have a few different sales locations and would like to filter your sales by location, you can then have different booking labels for each one of them.
You can add the booking label during the booking process or afterwards to an already existing booking.
Step 1 - Create your labels
Select Settings then Operations
Go to Booking labels
Type the name of your new booking label in the text field and select Add new label. Repeat for each label you need to create.
Remember to save your changes.

Step 2 - Label your bookings
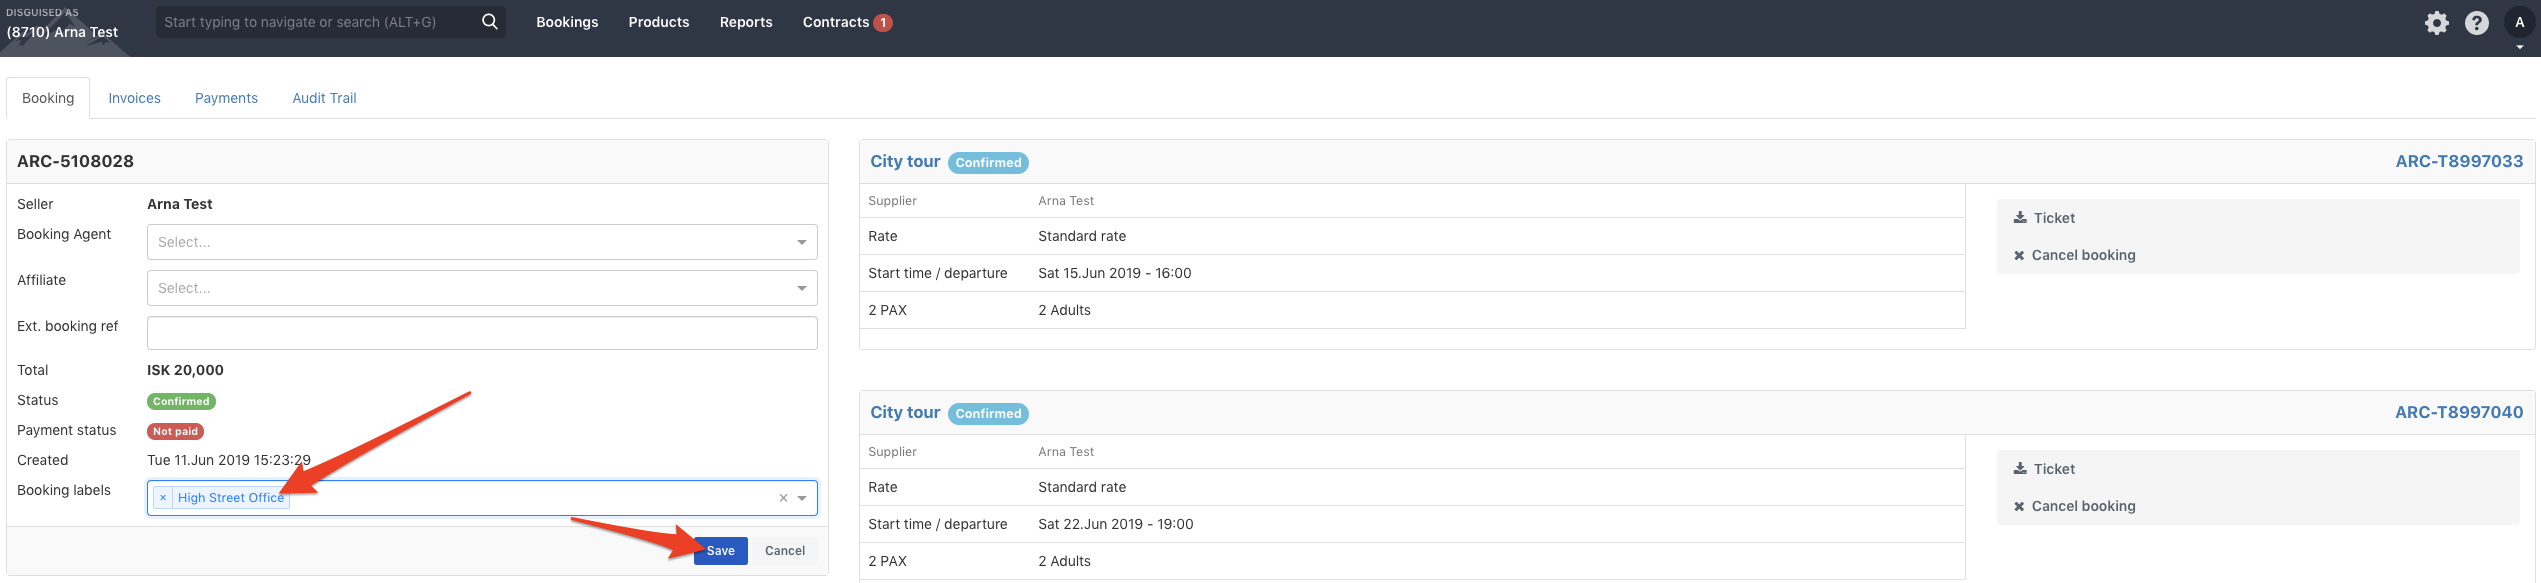
Open the booking you want to add the label to and select "Edit" by the sales information box.

Add the label in the booking label field and save.
You can also add the booking labels during the booking process. In the last step, there is a box where you can add your booking label.

Step 3 - Filter your Sales feed and the Income Statement
Once you start labelling your bookings, a filter will automatically appear on the right side of your sales feed. You can use this filter if you want to view bookings by label.

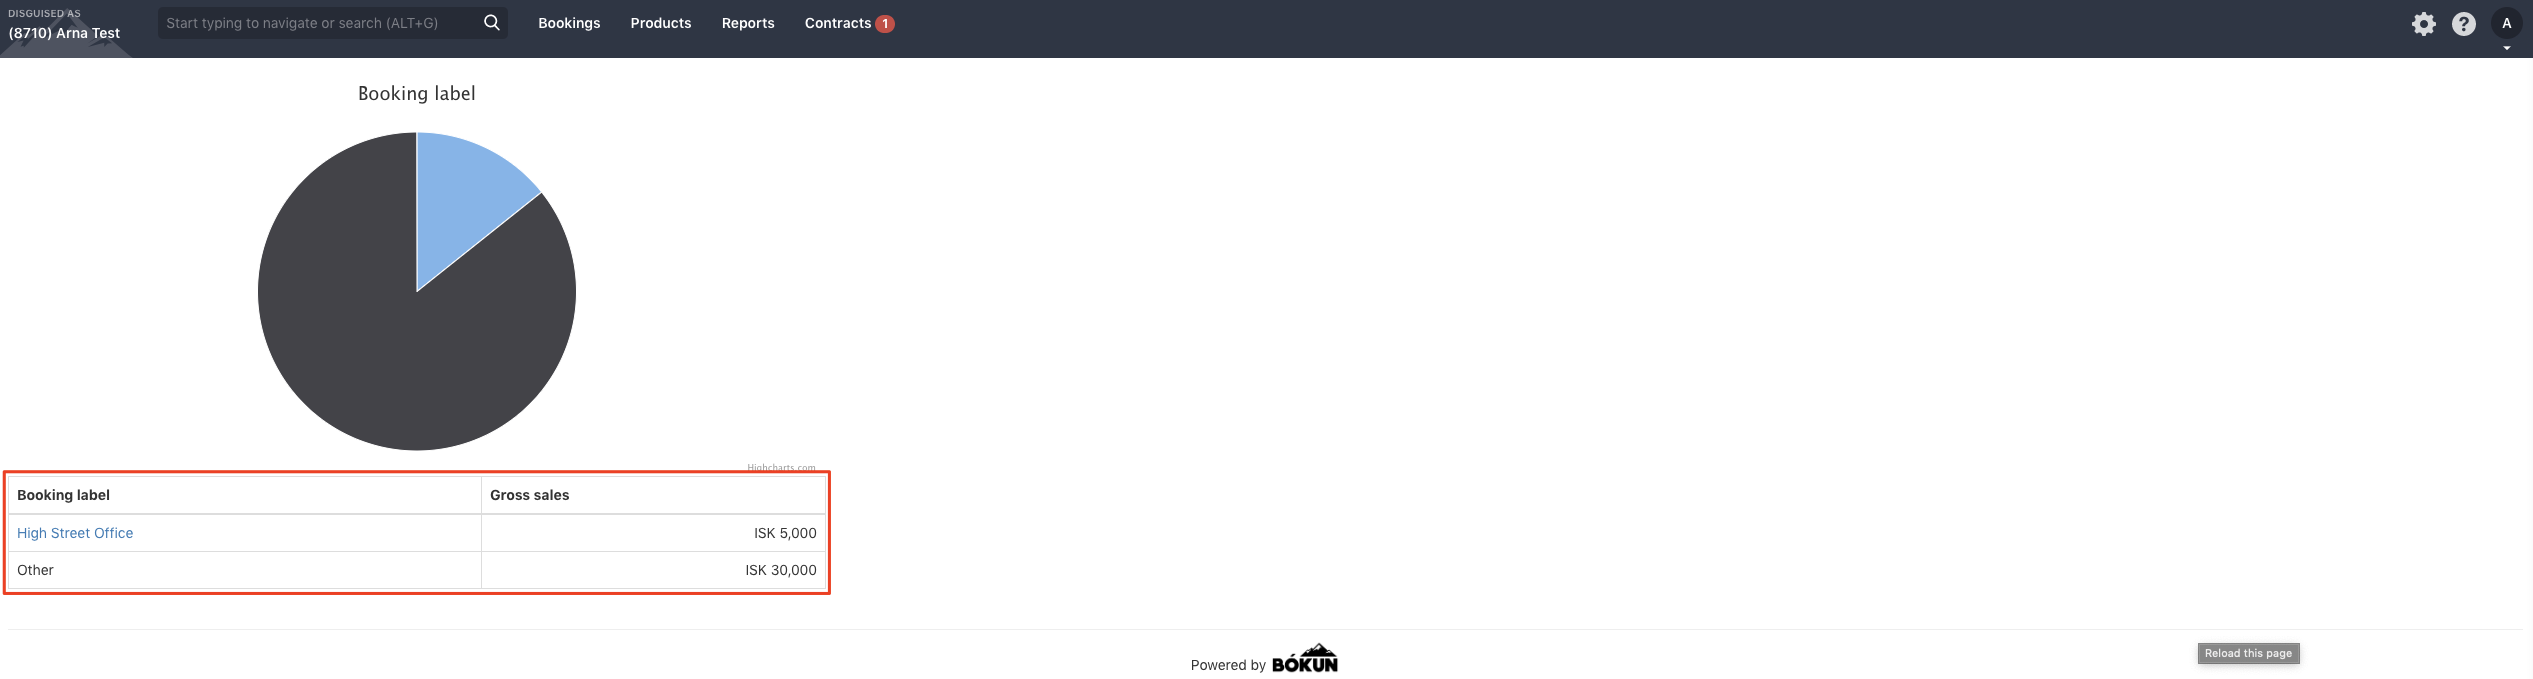
You can also use labels to filter your Income statement report. View your income statement report by selecting "Reports" > "Income statement". Scroll down the page until you come across Booking label as filtering option.